Progress on the new engine, HPL3, is coming along nicely and recently I changed the core rendering system into something called Pre-pass lighting. This switch has been made for a number of reasons, but before I got into that and what pre-pass lighting exactly is, I need to explain how we did it back in the “old days”.
Forward Rendering
The engine powering Penumbra (HPL1) uses something called forward rendering. This type of rendering works by rendering the entire scene on an object basis. So when rendering a chair, wall, or any geometry in the world, this was done by drawing it one time for every light that touches it. So an object that is lit by three lights has to be drawn three times, and so on. This technique can be quite limiting when setting up scenes as you need to be very careful when adding lights. It might not actually be clear exactly how much impact on performance a single light will have and levels usually require quite some tweaking to get right. The complexity of a scene can be expressed as:
Draw calls = Objects * Lights
This means that the number of draw calls can easily get very large and only adding a single light, even if it has little effect on the scene visually, can have very negative effects on performance.
Deferred Shading
When starting work on HPL2 (which was used for Amnesia) I wanted to get away from this annoying light limitations. Since HPL1 had been created a new technique called “Deferred shading” had emerged and when work on HPl2 was started, the average PC system was up for the the task.
What makes deferred shading special is that it separates rendering objects and rendering the lighting. This works by first rendering to a special G-buffer that contains information such as normals, depth and color of all on screen objects. The final output looks like this:
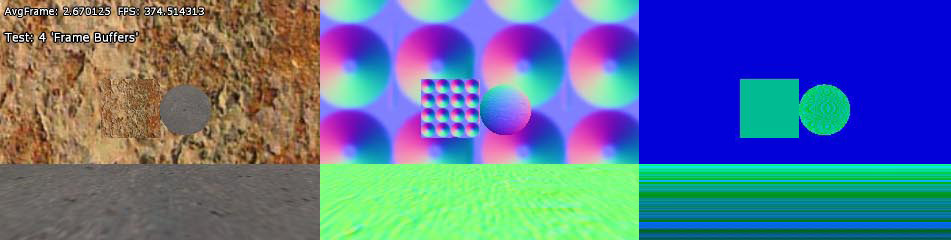
From left to right: Color, normals and depth. Note that these texture have 4 channels each and not visible are also saved specular intensity and power. These three texture then represent the properties of all visible data. It is then used by the lights to render the final image. This makes the complexity of the rendering:
Draw calls = Objects + Lights
This is a lot nicer and as lights and objects are separated, it is a lot easier to add lights to a scene without worrying about performance hits. It is also much simpler to intuitively understand how performance will be affected. By using this technique we where able to use a lot more light sources in Amnesia and considering all of the dynamic lights needed for the mechanics, the game would have been a lot harder to make using forward rendering.
Deferred rendering is not without problems though. First of all, rendering the G-buffer means rendering to three textures at one time which is quite performance heavy, meaning a scene with few lights runs faster on a forward renderer. Secondly, there is no support for fullscreen anti-aliasing either, and one has to do some hackish tricks to remove jagged edges (the “edge smooth” feature in Amnesia). Finally, there is much less material variety possible as every property needed to generate the final image needs to be in the G-buffer. Since we could mange without fancy skin shaders in Amnesia, it was turned out to not be too much of a problem though.
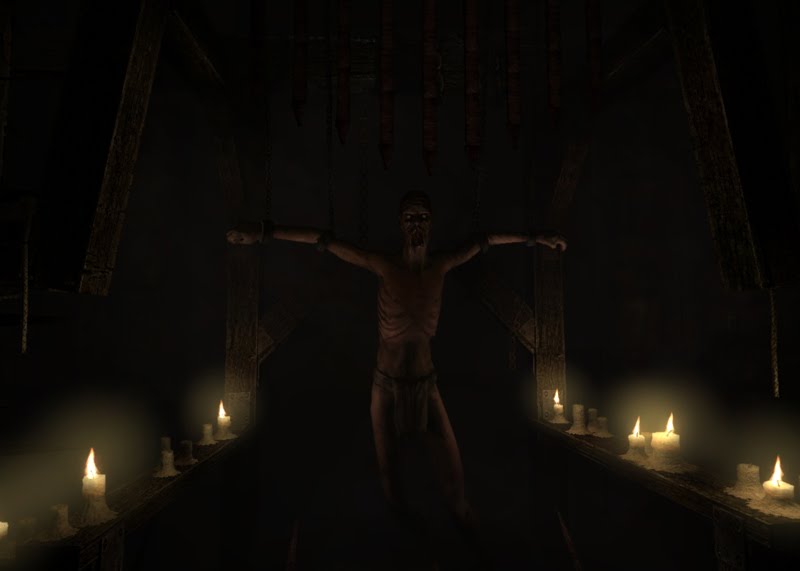
Scenes like the test of Agrippa above would not be possible in our old Renderer. In this test shot around 30 lights help light Agrippa in a nice fashion, and since the geometry and lighting is decoupled it is possible to run this with a high framerate.
Pre-pass lighting
I heard about this technique (first saw it here) during the development of Amnesia and was a bit interested in trying it out. I was interested in the tech back then since it made light rendering go faster, something that had proved a bit of a bottle neck in Amnesia. However, I did not have time back then and decided against it.
As I started to update the engine to HPL3 I again looked at this technology. This time more had been written on the subject and it had actually been tested. For example a similar algorithm was used in Insomniac’s Reistance 2 and Crytech goes over it in a paper about CryEngine 2. This also meant that the method was practical, and was well worth trying (I usually try and use tech I have been able to try in other games, as tech dead-ends can prove quite expensive).
Pre-pass lighting (or deferred lighting as it is called sometimes) is very similar to deferred shading and I could use much of the code from HPl2 when implementing it. Only a few changes in materials and light rendering was really needed. The rendering works by also first rendering to a G-buffer, but one only containing normal, depth and specular power. After that lights are rendered, but they render only part of the light equation; basically color and specular intensity. Then in a final pass all objects are rendered again and the light data from the previous pass is used to render the final image. The sequence is like this:
Render Normals+Depth -> Render Lights -> Render final image
The first good thing is that this technique is able to render lights faster, since each lights has to do less equations and access less textures. The algorithm also includes an extra step at the end, but this does not matter that much, as the added the final render takes is regained by the one less buffer needed to be rendered to in the first g-buffer pass (only 2 textures needed instead of the 3 deferred shading uses).
This speed up was not the main reason why I used it though. Since each object rendered again during the final pass, it is possible to have a much larger variety of material types. Instead of being confined to using what can be fitted into a g-buffer, a material can do specific calculations the final image pass. This allows for specialized skin shaders and other tricks. For example, it is now possible to have more features packed into the decal materials:
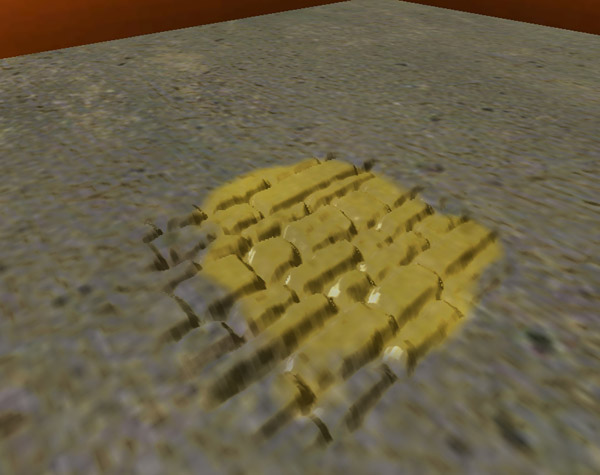
Above is a decal with both color, normalmap and height map, something not possible in the previous engine. (Note that color and normal have separate alpha and that the height map make the tiles seem carved out of the ground).
End notes
Now I have given a little rundown of how the new renderer works and how it differs from the old one. I have skipped a lot of the details and more technical stuff, to make the post a bit shorter. So if you have any questions, comment and I might have some kind of answer!
Also, sorry for the lack of new and exciting images in this post. Next tech feature should be more fun on that part, as I am now moving on to Terrain…
EDIT:
I eventually did some tests on the algorithm and compared it to the old renderer. Results are here.