Originally posted by Luis.
Hey there! So I finally dropped by to write a quick post on our stuff after quite a long hiatus (exactly 3 years, 3 months and 8 days long according to my last post) and Thomas pretty much took over the blog. Right now most of you might be wondering who’s typing even . The name is Luis and I mainly code the tools we use here at Frictional (also the ones you might have been using for making your own Amnesia custom stories) After the quick introduction, here comes a little editor feature showoff.
If you ever used the Amnesia tools yourself, it’s more than probable that you already know about this little buddy here:
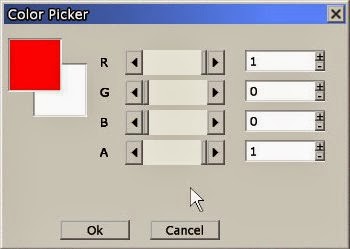
One could say it is functional. I mean, you actually can pick a color by using it. But it had a little problem. It sucked, and real bad I must add.
When you are editing a level and need to pick a color for anything, be it the diffuse color for a light or the color multiplier for some illumination texture, you are probably going to need a nice system that allows for quick tweaking with not much sweat. This is definitely not the case of our old color picker, mainly because of two reasons: the RGB color space and lack of immediate preview of changes.
Selecting a color in the RGB color space is pretty straightforward you might think. And it is indeed, you only need to set the values for the Red, Green and Blue components and you are all set. That’s it. Okay, but what if you need to choose from a range for a particular color tonality? How are you supposed to know which RGB values you need to set for that? Summing up, RGB is a pretty uninintuitive system when it comes to edition, so we pretty much had to update the color picker to use the HSB color model as well.
This model describes colors as follows:
- the H value, ranging from 0 to 360, controls the hue for the resulting color;
- S, which stands for saturation and ranges from 0 to 100, indicates, in layman terms, how washed the color will look, with 0 being white and 100 equalling the original hue color (for a B value of 100);
- and finally B, standing for brightness and ranging from 0 to 100 as well, is quite self explanatory and sets how bright the final color will be, with 0 meaning black and 100 meaning the color that is set by the other 2 parameters.
As for the immediate preview, anyone who used the old picker knows that you had to exit the picker in order to apply and see the changes. When you need to tweak things, which involves constantly changing values and checking out how it looks, this setup is bound to get old and annoying way quicker than you would want it to. To fix this, the new picker can change the target color on the fly, letting the user see the end result in the scene while modifying the values.
Another upgrade that speeds things up a lot is going as visual as possible. No matter which parameter you are editing, being able to change it via a slider or some other graphical tool that you can click on will always help tons. The drawback of these, though, is that it’s very likely that you spend more time on them than needed just because they are so fun to use.
After all this long-ish introduction, just say hi to our new color picker:

And see it in action in this short demo video: